Crane Problems and Mistakes
This page takes you through various dumb ideas, problems, and mistakes I had with my crane.
Problem No. 1 - Removing the temporary rigging.
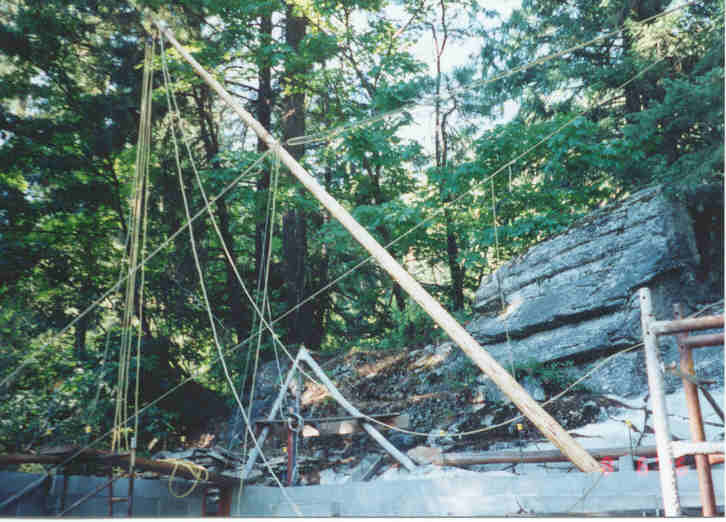
My first mistake was a bad plan for removing the temporary rigging. As you can see in the next picture, the rigging to lift the mast in place was fastened to about the middle of the mast. That would put it fifteen feet off the ground once the mast was up. In anticipation of this, I fastened the block and guys to a sort of loose loop of chain around the mast. I figured that as soon as the tension was relaxed, and the mast was vertical, the rigging would just slide down to where I could reach it. The problem was that the log was rough, the diameter increased on the way down, and the weight of the block kept enough tension on the chain loop so that it only slid an inch or so and then got hung up.
I suppose I wouldn't have had to remove the rigging, but I did anyway. My method was a little unnerving and probably a little dangerous. What I did was to set a ladder on a ledge in the cliff behind the mast and then lean the ladder out away from the cliff and up against the mast. I could then reach the rigging from the ladder. It was a little hard to keep the ladder steady, and it was an awful long way down if I looked down, so I just concentrated on keeping my balance, looking up, and getting the rigging loose. It worked but it was a little scary.
Problem No. 2 - Fastening the guys.
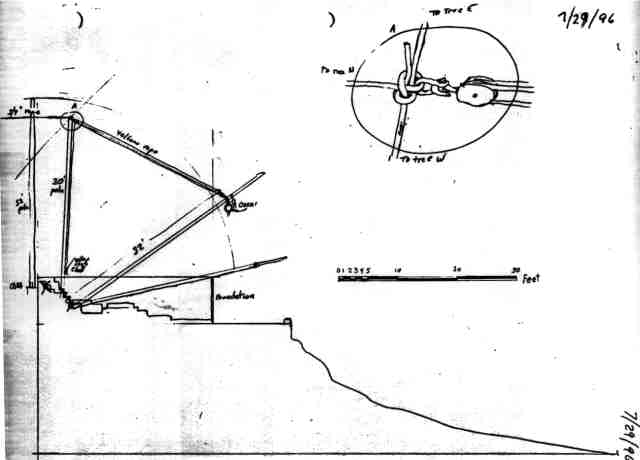
In my original design, I had what turned out to be a very dumb idea for fastening the guys to the mast. It is partly shown in the inset at the upper right of the drawing below. The idea was to tie the knot shown there and have that knot positioned right on top of the mast. To keep it there, I installed a piece of rebar that stuck straight up out of the center of the top of the mast that went through the same loop in the knot that you see the shackle going through in the drawing. I figured most of the forces would be carried by the ropes and that there wouldn't be much force on the mast or that rebar. But just in case, I cleverly wrapped several turns of wire tightly around the top of the mast to prevent the rebar from splitting out.
What happened was that the guy shown coming out the bottom of the knot in the drawing would be slack any time the crane load was on that side. That made the piece of rebar act just like a marlinspike and it pulled the knot open.
From the ground I could see that my block was no longer at the top of the mast but was hanging down about a foot. The rest of the knot was still up there around the rebar, but the thing was no longer safe and I had to get it back down to redo the top.
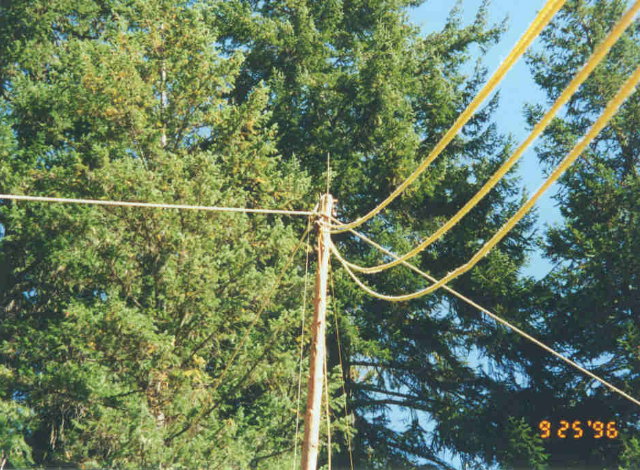
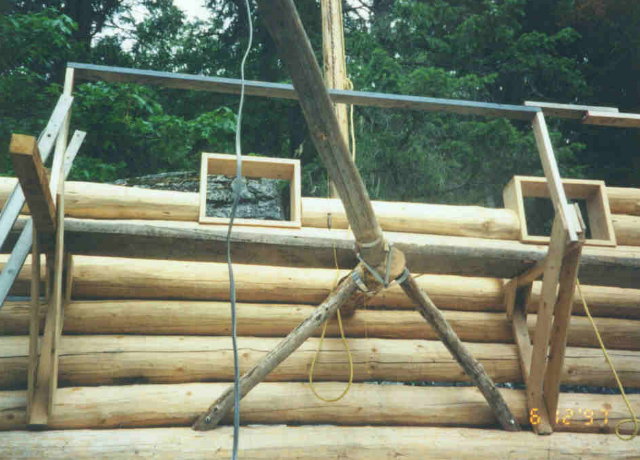
To take the weight of the boom off the mast, I chained the boom to a corner lifting pole which I happened to have in place at the time as shown in this picture. Then I lowered the mast, re-rigged the top using three clove hitches, and raised it back up again. I had no more problems with that rigging from then on.
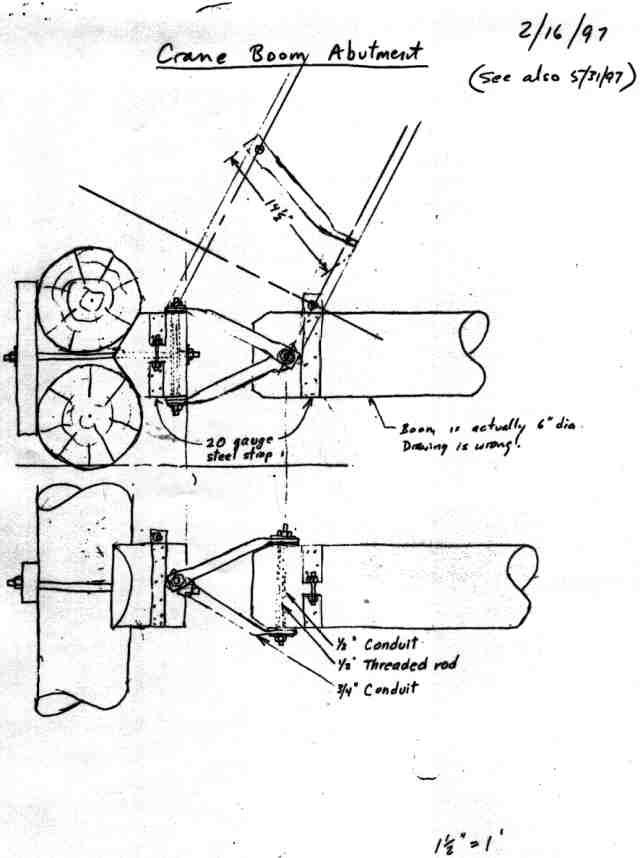
Problem No. 3 - Clearing the scaffolding.
Fortunately this problem only occurred on paper. The next drawing shows my original design for the CBA. But before I even built it, I realized that the CBA needed to stand the end of the boom out away from the wall so the boom could be nearly vertical without hitting the scaffolding above it.
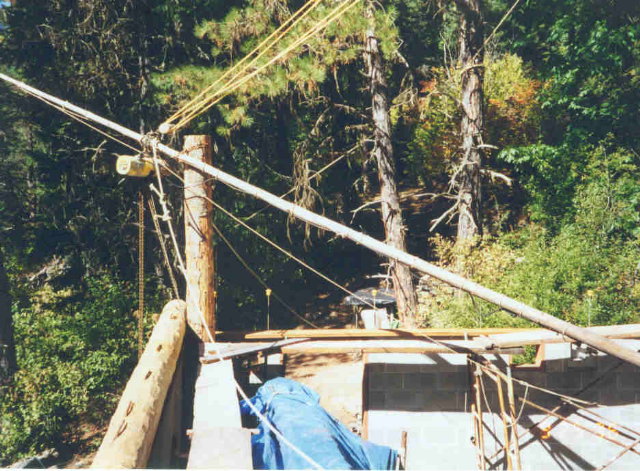
Here you see the U-joint installed on the CBA before the boom was attached.
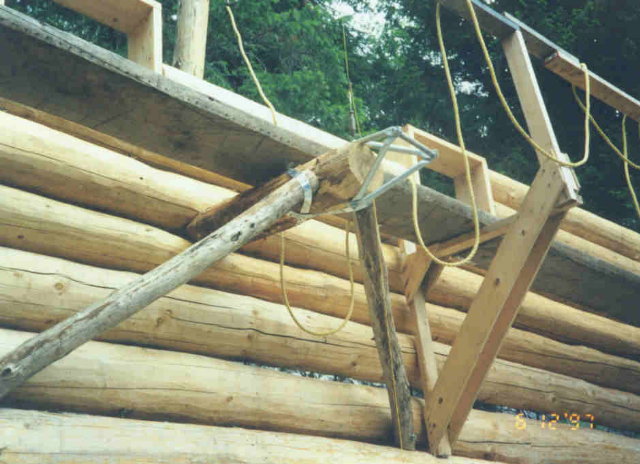
And in this picture, you can see that the boom is attached, ready for work. I was very happy and proud of this design at this point. That was before I had put it to any serious work.
Problem No. 4 - Springing.
The first boom I used was a pretty skinny log. It had been the boom I used to construct the snow shed over the trailer, and since I already had it, I decided to use it until it broke. It started springing, or bending, more than I liked under heavy loads, so I made a stiffener with wire and a home-made turnbuckle which you see in this picture. It worked until I finally retired that boom and replaced it with a bigger one. In fact, I still have that original boom in one piece. I intend to use it for the railings around the porch some day.

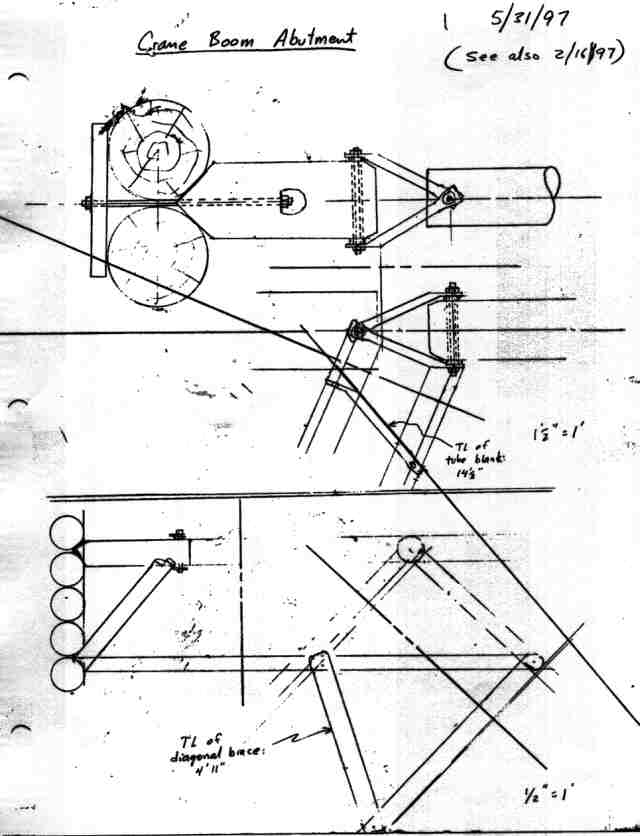
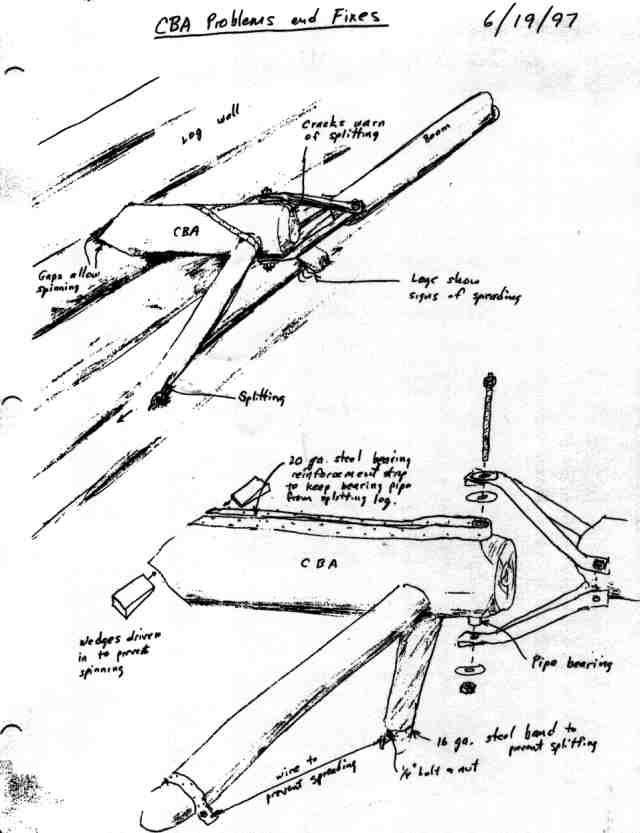
Problems No. 5, 6, and 7 - Spinning, splitting, and spreading.
After about a week's use, new problems developed. These problems and the way I fixed them are shown in the next drawing. They are described in my journal here.
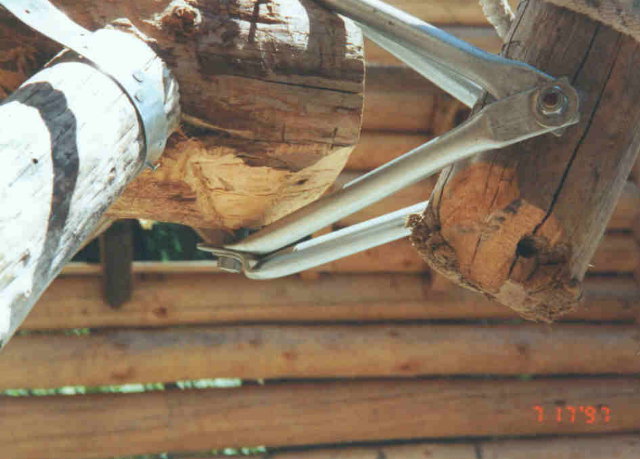
Problem No. 8- Buckling.
As you can see in the next pictures, the compression forces on the CBA U-joint were great enough to buckle the 3/4" EMT. I used it this way for a while, but then I lost confidence in it and replaced the U-joint with the cable arrangement described in the design page.
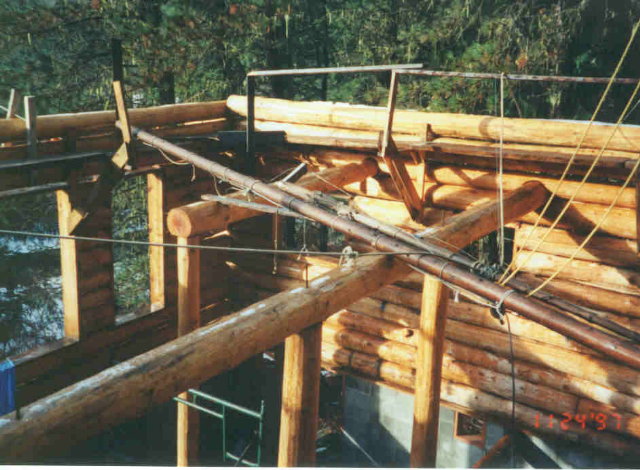
Problem No. 9 - Breaking.
I had replaced the original skinny boom with a stouter one, but while I was dragging a log out of the woods, I broke this boom which you see lying where it fell across the loft beams. No harm was done but I had to replace the boom again.
Fortunately, I was able to overcome and resolve all the problems I ran into with the crane and it ended up getting the job done right up until I finally dismantled it. Building and using that crane was a great and fun experience.
©2005, 2007 Paul R. Martin, All rights reserved.